

That tight, aching feeling along your shin bone after a run isn’t something you should just push through. Using a foam roller for shin splints is one of the simplest ways to ease muscle tightness and improve blood flow to the area, but only if you roll the right muscles with the right technique. Get it wrong and you can irritate the area further instead of calming it down.
This guide shows you exactly how to use a foam roller to relieve shin splint pain, step by step, including which muscles to target, how much pressure to apply, and how often to do it. We’ll also cover the mistakes that stop this shin splints treatment foam roller method from working, and when rolling alone won’t be enough to fix the underlying problem.
At ModPod Podiatry, we see shin splints regularly in runners and active Sydneysiders across our clinics, and foam rolling is often just one piece of the puzzle. If your pain persists despite consistent rolling, that’s usually a sign of a biomechanical issue, like poor running gait or inadequate footwear support, that needs a proper podiatry assessment for shin splints rather than more self-treatment at home.
Why foam rolling helps with shin splints
What’s actually happening in your shin
Shin splints, or medial tibial stress syndrome as podiatrists call it, happen when the muscles and connective tissue along your tibia get overloaded from repetitive impact. Running, jumping, or a sudden jump in training volume causes repetitive loading that irritates the periosteum, the thin layer covering your shin bone, and that overload is why shin splints develop. That irritation is what produces the sharp or dull ache you feel along the inside edge of your shin, especially after your foot strikes the ground.
How rolling releases the pressure
Foam rolling doesn’t fix the bone irritation directly, but it does address one of the main contributors to it: tight, overworked muscles pulling on that area. Rolling applies sustained pressure to muscle tissue and fascia, encouraging myofascial release and helping muscle fibres that have tightened up from overuse to relax. This also boosts blood flow to the region, which speeds up the delivery of oxygen and nutrients your muscles need to recover between training sessions.
Foam rolling calms the muscles pulling on your shin bone, it doesn’t heal the bone itself.
It’s not the bone that needs rolling
Your calf muscles, the soleus and gastrocnemius, connect down into the Achilles and influence how much strain gets transferred through your lower leg with every stride. When these muscles are tight, they change how your foot and ankle move, which increases the load on the tibia, so it’s worth understanding what keeps calves tight after a run. The tibialis anterior, running down the front of your shin, works constantly to control your foot as it lands, and it fatigues quickly if you’ve ramped up mileage too fast. Rolling both of these muscle groups, not the shin bone itself, is what actually makes a difference.
The limits of self-treatment
Foam rolling is genuinely useful, but it won’t override poor biomechanics, shoes that have run past their mileage, or a training schedule that’s asking too much of your legs too soon. What causes overpronation, a leg length difference, or weak hip and ankle stability can all increase the strain on your shins regardless of how consistently you roll. Some runners roll every single day and still get shin splints back within a fortnight of returning to training, because the underlying training load and movement pattern haven’t changed. That’s usually where a proper biomechanical assessment becomes necessary, since it identifies whether your gait, footwear support, or foot posture is driving the problem in the first place. Foam rolling works best as one part of a broader recovery plan alongside exercises for shin splints relief, not a standalone cure.
Step 1. Choose the right foam roller
Density matters more than size
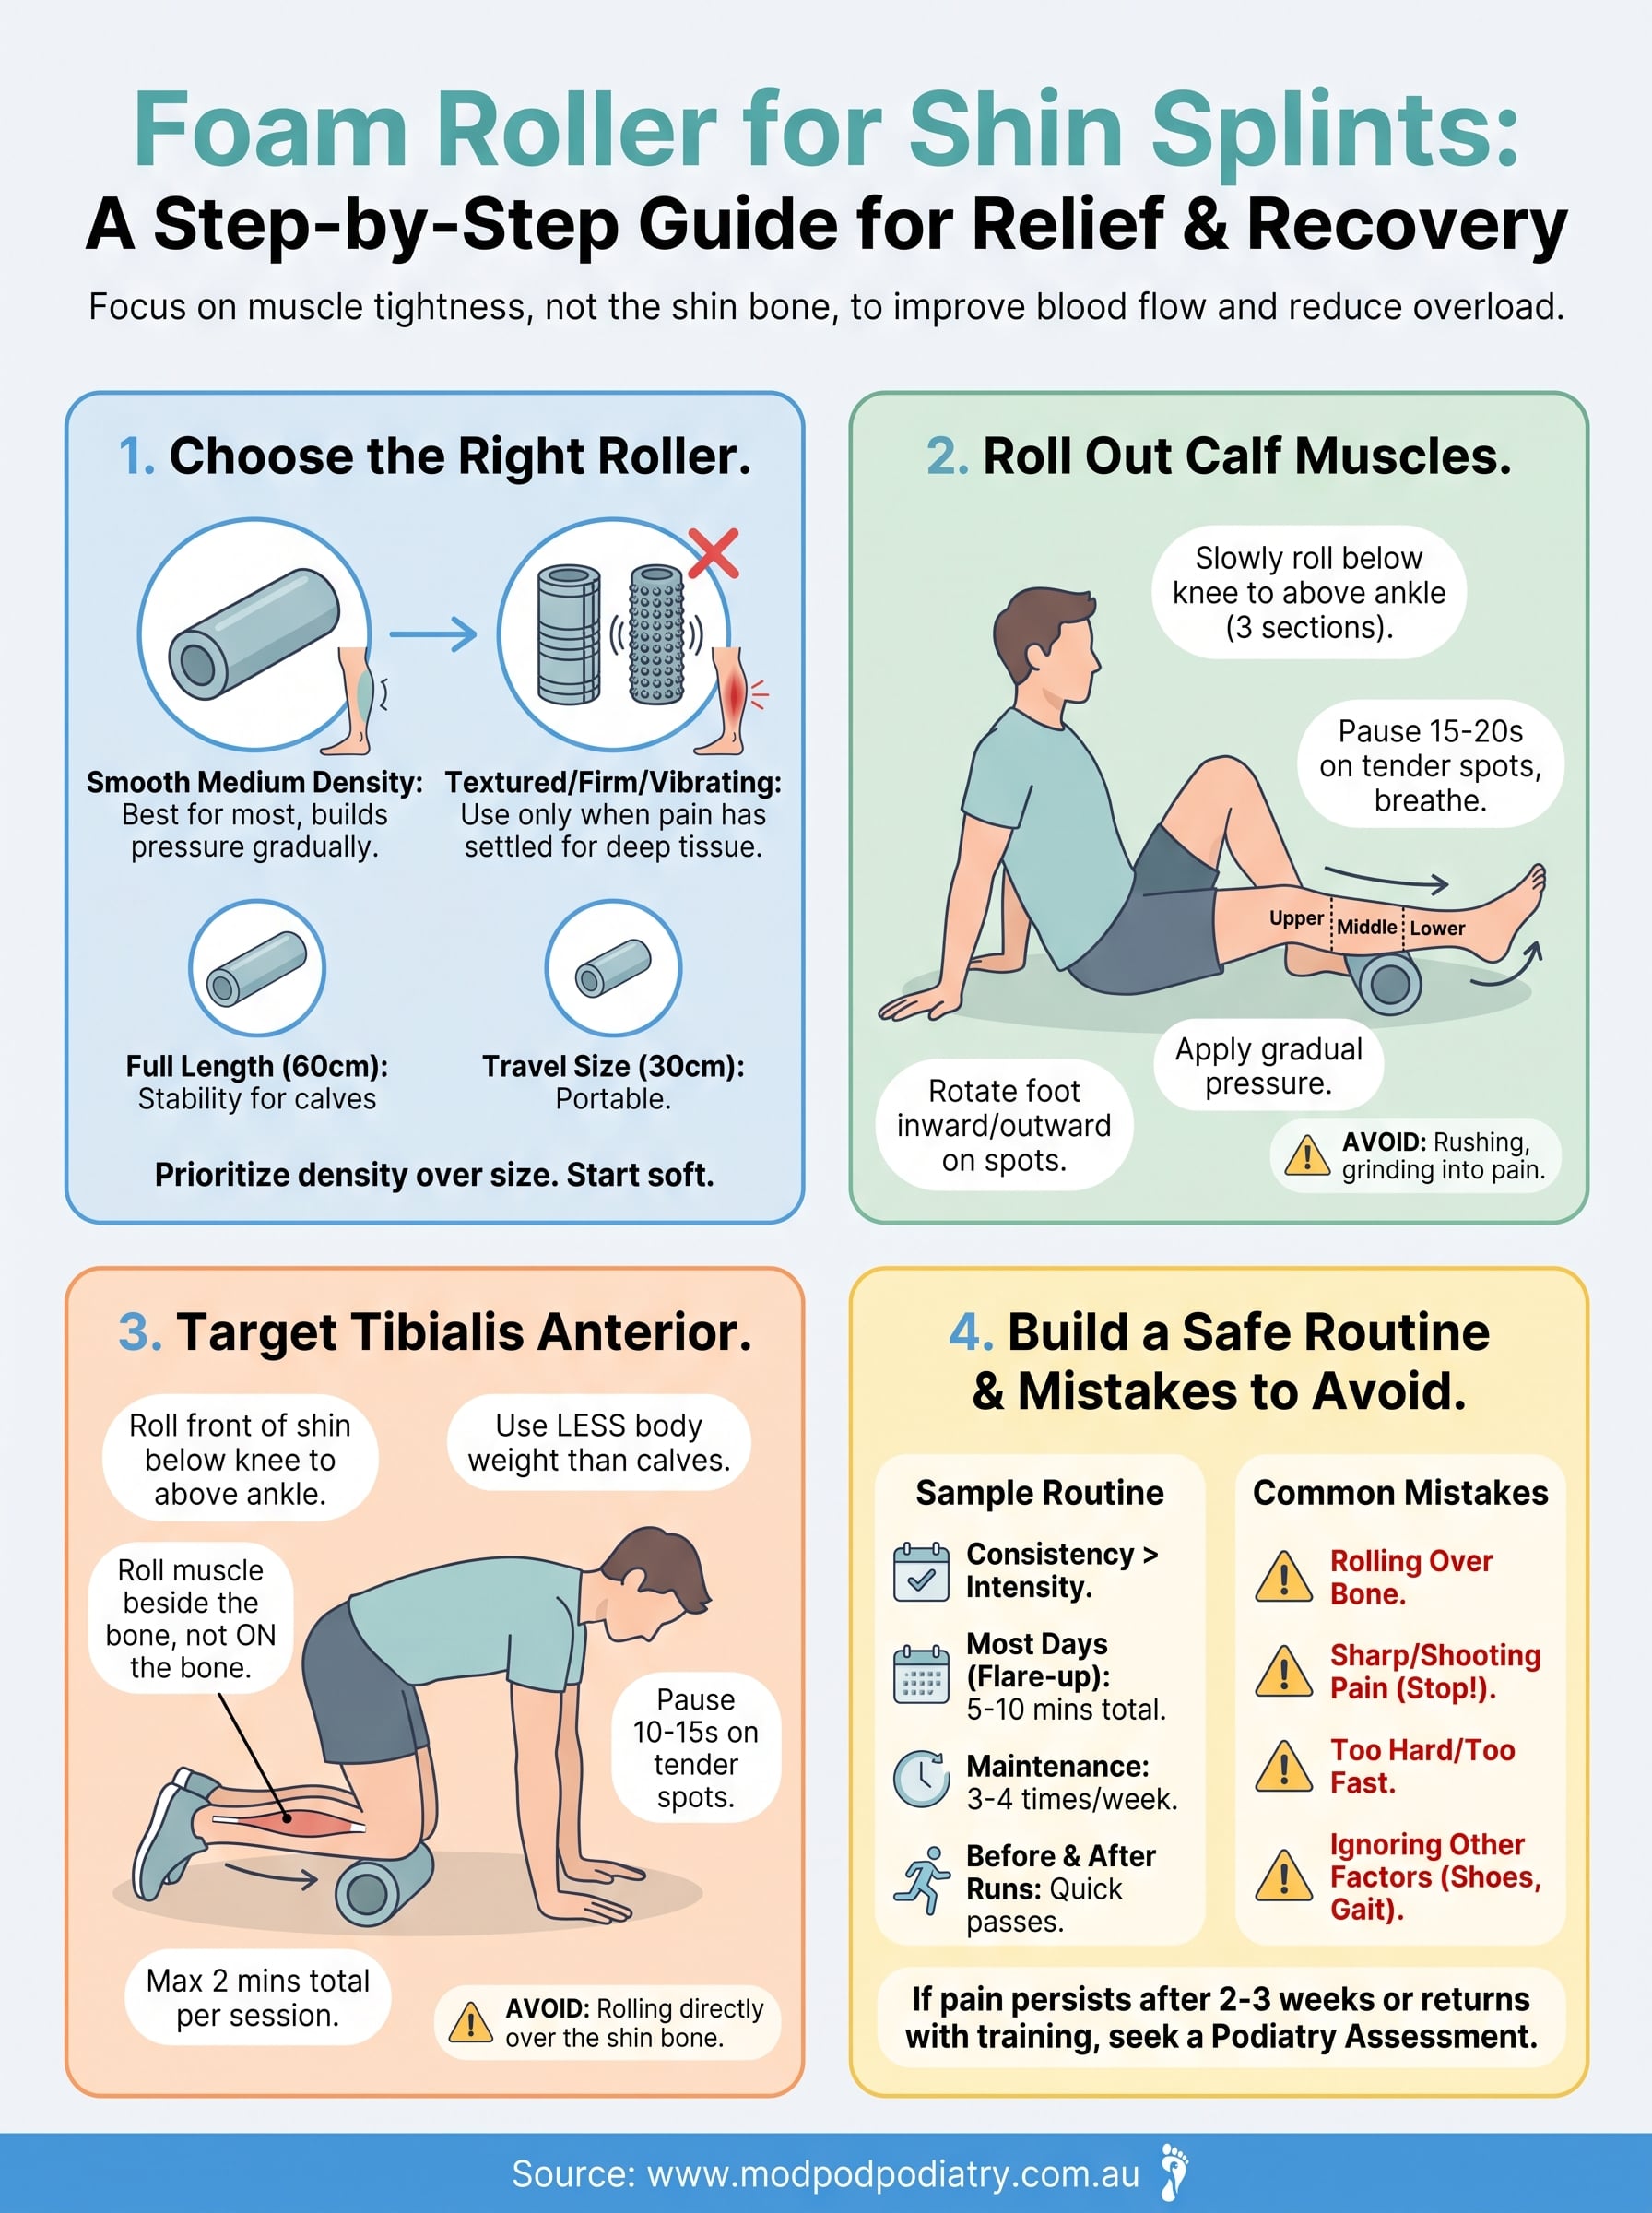
Getting the right foam roller density matters more than picking a roller because it looks sturdy on a shelf. A rock-hard roller digs straight into already irritated muscle and can leave you sorer than before you started, especially if you’re new to rolling or your shin splints are flaring up badly. Softer, medium-density rollers let you build pressure gradually, which suits most people dealing with active shin pain rather than chronic, well-conditioned muscle tightness.
Size and texture make a real difference
Length counts too. A full-length roller (around 60cm) gives you more stability when working down the length of your calf, while a smaller travel-sized roller (30cm) is easier to pack for the gym bag or a trip away. Textured rollers with ridges or knobs can dig deeper into tight spots, but they’re not the best starting point if you’re new to this or your shins are genuinely inflamed, since that extra grip can aggravate the area rather than ease it.
Start soft, go smooth, and only add firmness once your muscles tolerate it well.
Comparing your options
Here’s how the common roller types stack up for shin splint recovery:
| Roller Type | Best For | Avoid If |
|---|---|---|
| Soft foam (low density) | Beginners, acute pain, first week of rolling | Rarely an issue |
| Medium foam (standard density) | Most runners, ongoing maintenance | Fresh, sharp shin pain |
| Firm/textured roller | Deep tissue work once pain has settled | Active inflammation or acute injury |
| Vibrating roller | Faster muscle relaxation, time-poor athletes | Budget-conscious buyers |
Athletes with existing rollers at home don’t need to rush out and buy something new. What matters more than the exact model is using it correctly on the right muscles, which is what the next steps cover. If you’re unsure whether your shin pain is straightforward tightness or something that needs proper diagnosis, our sports podiatrists can assess your gait and recommend the right recovery tools for your specific situation.
Step 2. Roll out your calf muscles
Get your setup right
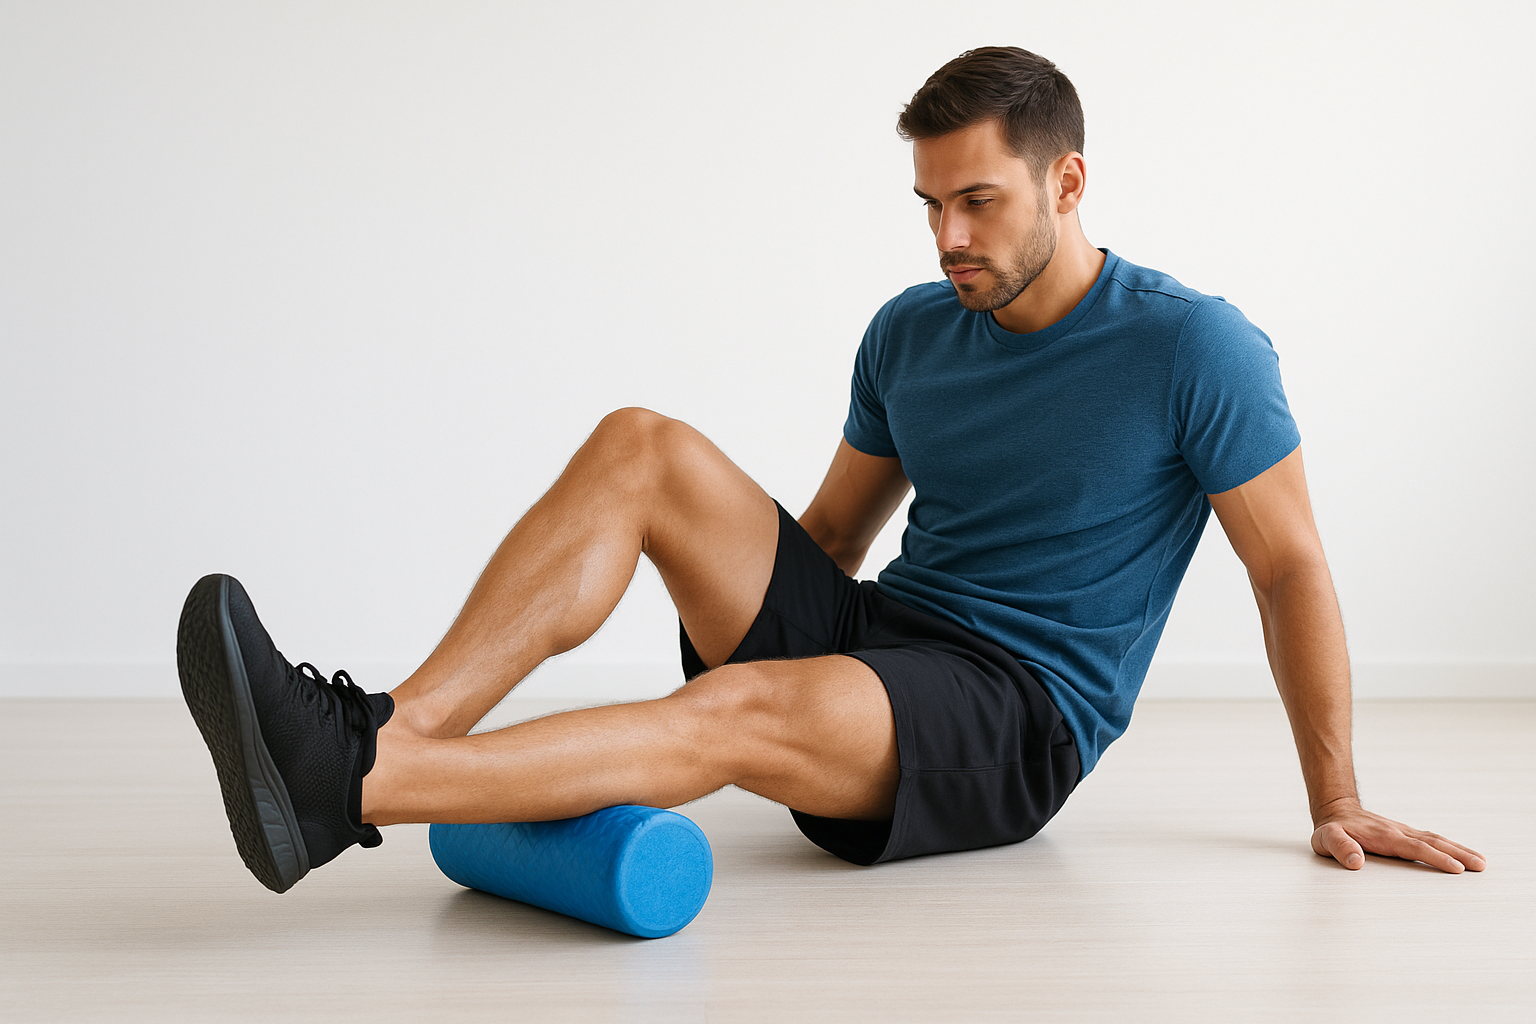
Sit on the floor with the roller placed under your calf, just below the knee, and prop yourself up on your hands with your other leg either resting on top for extra pressure or lifted off the ground for a lighter pass. Keep your shin muscles relaxed rather than tensed, since a tight leg fights against the roller instead of yielding to it. Using a foam roller for shin splints works best when you go slowly, so resist the urge to rush through the full length of the calf in one quick pass.
Work the muscle in small sections
Break the calf into three sections, upper, middle, and lower, and spend around 30 to 45 seconds on each rather than gliding continuously from knee to ankle. When you find a tender spot, pause there for 15 to 20 seconds and breathe through the discomfort until it eases slightly, a technique physios often call a static hold. Rotate your foot slightly inward and outward while pausing on tight spots, since this shifts pressure across the soleus and gastrocnemius differently and reaches fibres a straight pass misses.
If a spot doesn’t ease within 20 seconds of steady pressure, move on rather than grinding into it.
Avoid these common mistakes
Rolling too fast, too hard, or directly over bone rather than muscle undoes most of the benefit and can leave your calves bruised the next day. Keep these points in mind:
- Never roll directly over the shin bone itself, only the soft calf muscle behind it
- Stop immediately if you feel sharp, shooting pain rather than a dull, achy tightness
- Apply body weight gradually, especially in your first week of rolling
- Roll before and after training, not only when pain flares up
Tightness in this area directly affects how much load transfers up through your lower leg with every stride, so consistent calf work here genuinely changes how your shins feel during a run.
Step 3. Target the tibialis anterior
Getting into position
Kneel on the floor with the roller placed just below your knee on the front of your shin, then lean forward onto your forearms so your body weight presses into muscle rather than bone. Cross your other leg over the ankle for extra pressure once the area tolerates it, or keep both knees down for a gentler pass while you’re still building tolerance. The tibialis anterior sits just to the outside of your shin bone, where pain at the front of the shin usually shows up, so angle your leg slightly until you feel the muscle belly under the roller rather than the hard edge of bone.
Roll the muscle beside the bone, never the bone itself.
Rolling technique that actually works
Move slowly from just under the knee to just above the ankle, covering only a few centimetres every few seconds rather than sweeping the whole length in one go. Given how close this muscle sits to bone, use less body weight here than you would on your calves, and stop the instant you feel sharp pain rather than a dull, manageable ache. Pausing on tender spots for 10 to 15 seconds, shorter than the hold you’d use on your calf, is usually enough given how thin the muscle is through this section of the leg.
What to avoid
Keep your first few sessions light, since this muscle group fatigues quickly once you’ve ramped up training volume, and stacking heavy rolling on top of that can slow recovery instead of speeding it up.
- Skip this step entirely if you feel sharp, localised pain that could point to signs of a shin stress fracture rather than muscle tightness
- Roll for no more than two minutes total on this muscle per session
- Pair it with calf work, since tightness in both areas usually travels together
Persistent pain despite careful technique is worth flagging to a podiatrist, since it can rule out a stress fracture before you keep training on it.
Step 4. Build a safe weekly routine
How often to roll
Consistency beats intensity when you’re using a foam roller for shin splints, so aim for short daily sessions rather than one long grinding session once a week. Five to ten minutes covering both the calf and tibialis anterior, done most days during a flare-up, does more for tissue recovery than a single 30-minute session that leaves you sore for two days after. Once your pain settles, you can drop back to three or four sessions a week as a maintenance routine rather than an active treatment.
A sample weekly plan
Getting the timing right around your training matters just as much as the technique itself. Try this structure for the first few weeks:
- Monday, Wednesday, Friday: 5 minutes calf rolling, 2 minutes tibialis anterior, before any run
- Tuesday, Thursday: light rolling only, 3 to 4 minutes total, on rest days
- After every run: a quick 2-minute pass on both muscle groups while they’re still warm
- Weekends: rest from rolling if pain has settled, or repeat the weekday routine if you’re still flaring
Rolling daily for ten minutes beats one long session a week, every time.
Scaling training alongside rolling
Running volume needs to come down while your legs recover, not stay flat while you add rolling on top and hope it compensates. A safe approach is trimming your weekly mileage by around 20 to 30 percent for two weeks, then building back gradually rather than jumping straight to your previous load. Watching how your shins respond to that reduced volume tells you more about whether the underlying issue is settling than the rolling alone ever will.
When to reassess
Progress should be steady, not stalled. If your shin pain hasn’t noticeably eased after two to three weeks of this routine, which is slower than what to expect from shin splint recovery, or it keeps returning as soon as you resume normal training, that’s the point to stop self-managing and book in for a proper podiatry assessment. A podiatrist can check whether your footwear or foot posture is the real driver behind the ongoing strain, usually by analysing your running gait.
Getting back to pain-free movement
Rolling your calves and tibialis anterior consistently, with the right pressure and enough patience, genuinely eases the tightness driving your shin pain. A foam roller for shin splints works best alongside smart training adjustments, not as a fix you bolt onto an unchanged running schedule. Trim your mileage, follow the weekly routine, and give your legs time to settle rather than expecting overnight results.
But if pain lingers past a few weeks, or keeps returning the moment you resume normal training, that’s your cue to stop guessing and get answers. A gait assessment often uncovers the real driver behind recurring shin splints, whether that’s footwear, foot posture, or biomechanics rolling can’t touch. Don’t wait until it sidelines you completely. Book a shin splints assessment online with one of our podiatrists and get a proper plan for staying pain-free on your runs.

