
That dull, aching pain along your shin bone after a run isn’t something to push through. Whether it flares up during training or lingers the next morning, shin splints can sideline you from sport for weeks if you ignore the warning signs. The good news is that the right shin splints exercises can settle the pain down and stop it coming back.
If you’ve searched for exercises for shin splints, you’re probably after a straightforward answer: what to do, how often, and why it actually works. Strengthening the muscles around your lower leg, improving ankle mobility, and correcting the load through your shin are the keys to real relief, not just rest and hoping for the best. Stretching for shin splints matters too, and the right stretching exercises for shin splints are part of the picture, but only part of it.
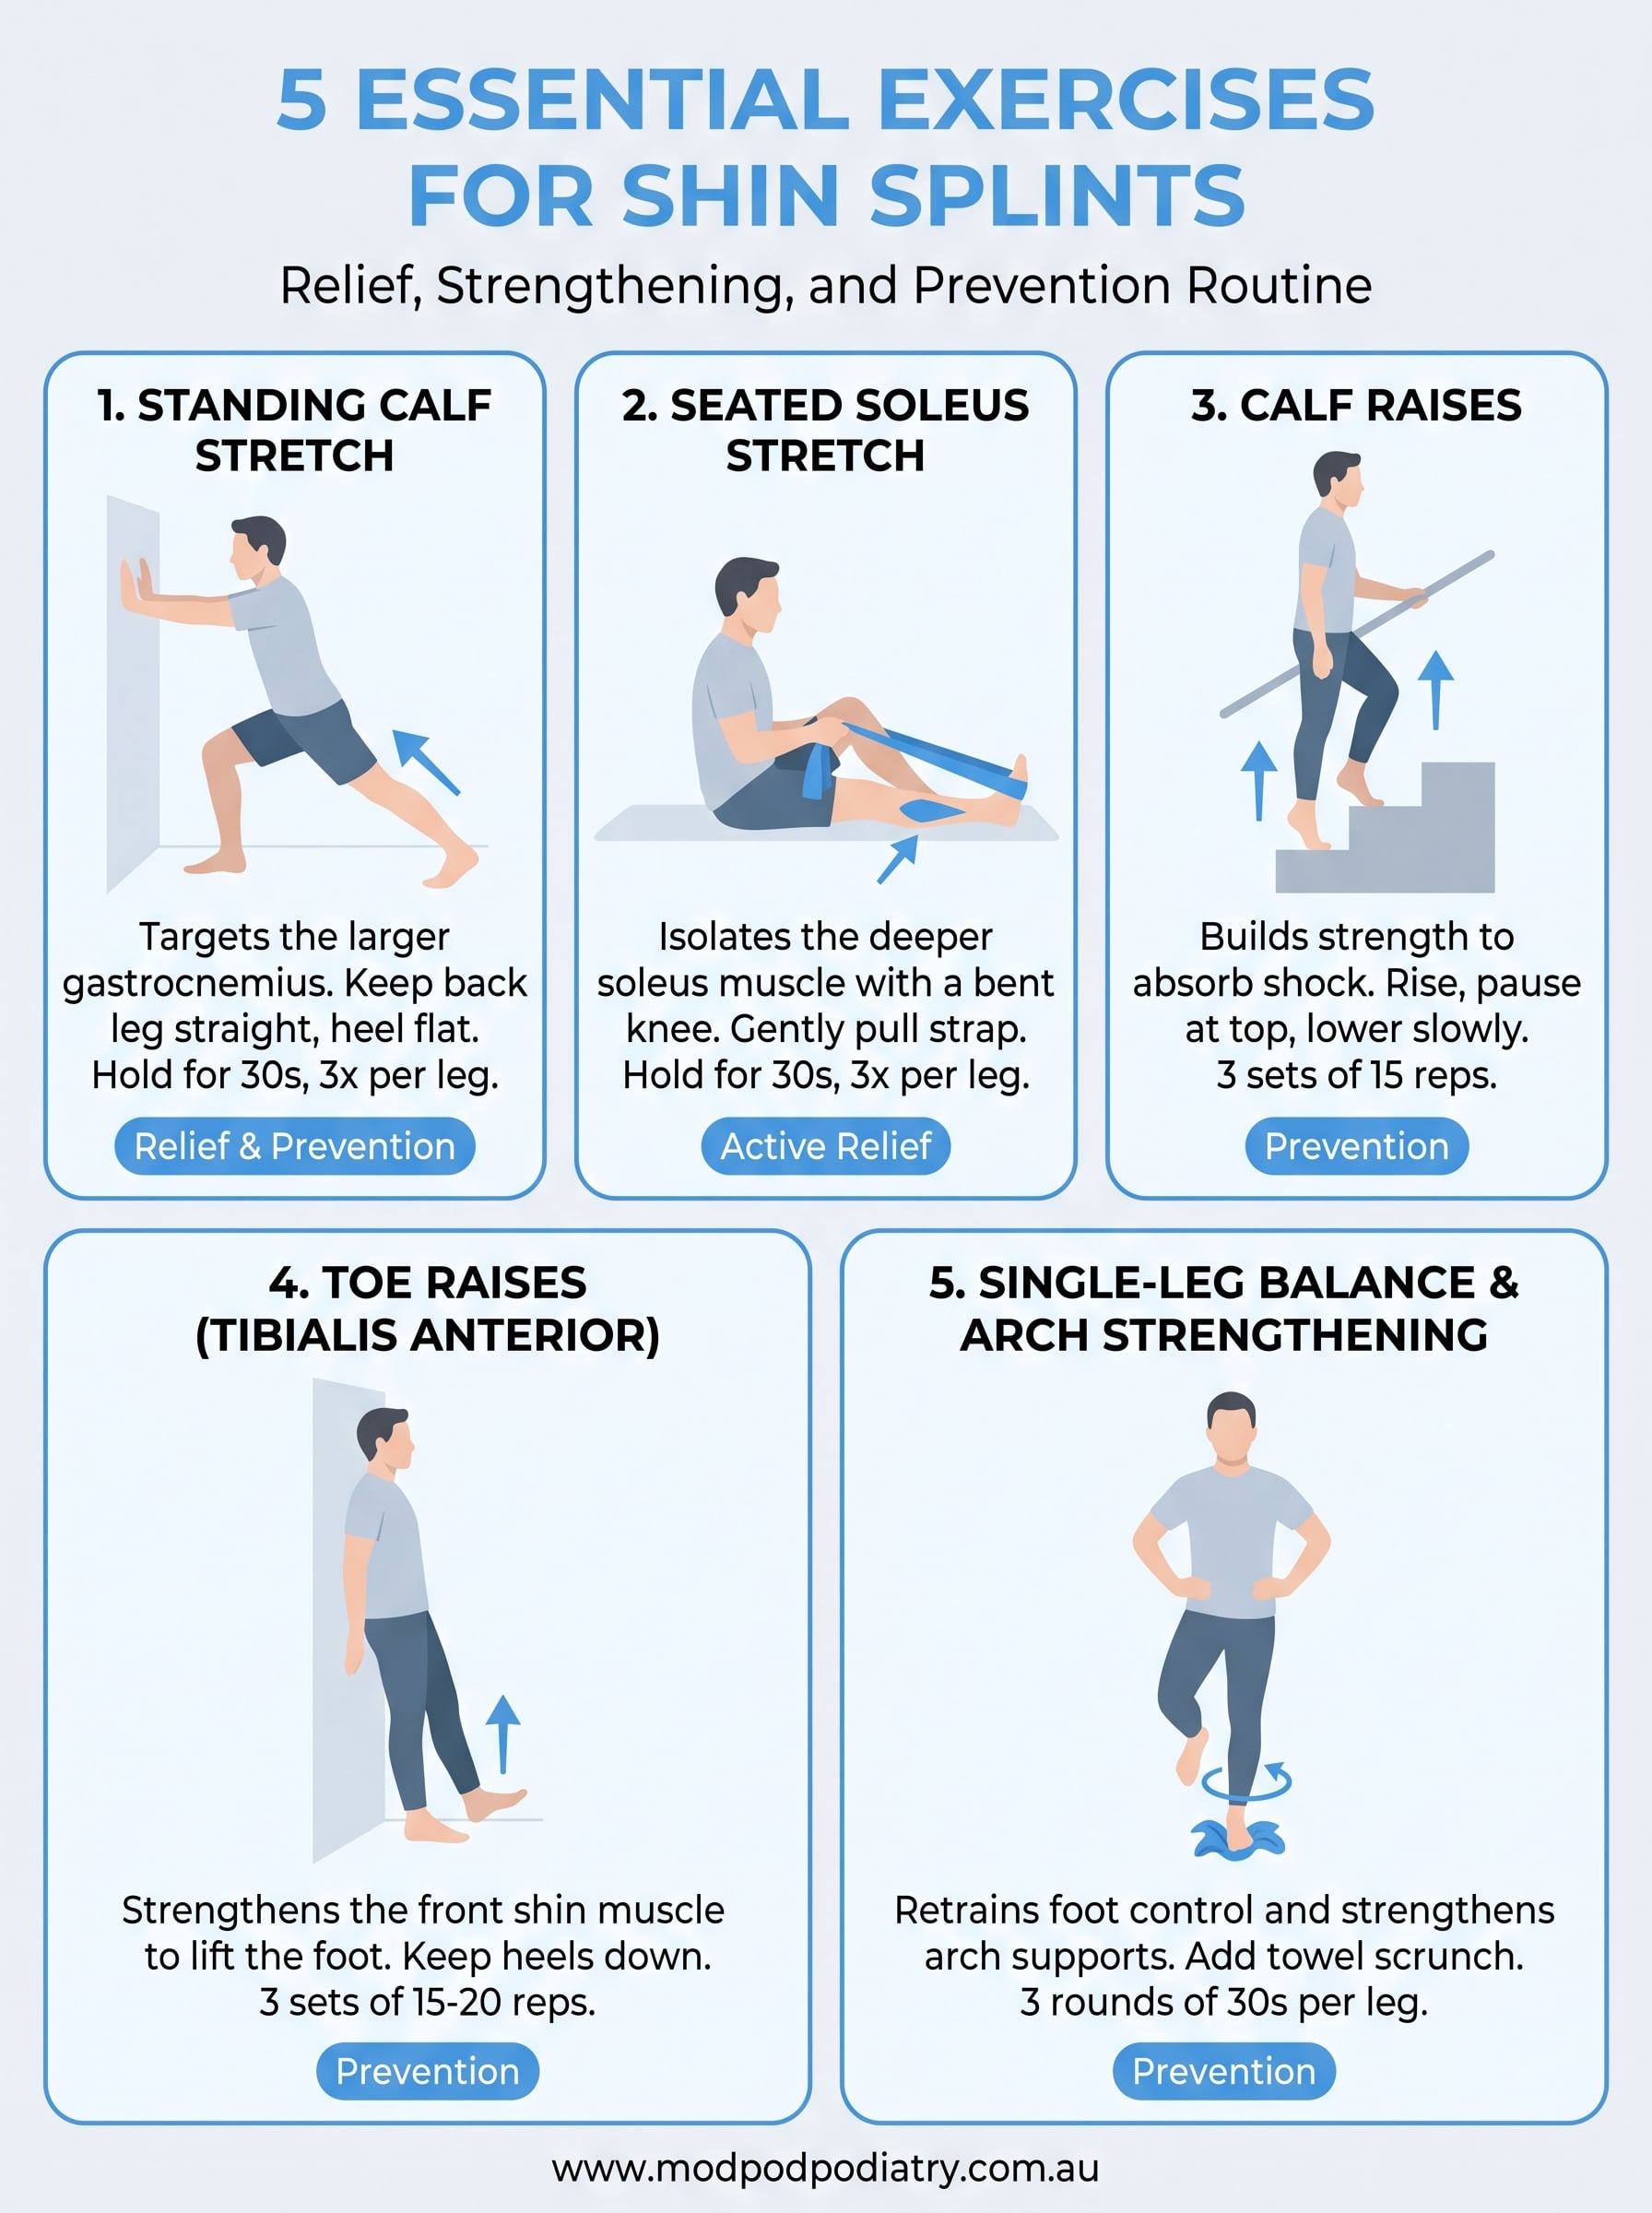
In this guide, we’ve pulled together five exercises we regularly recommend to runners, footballers and active patients during shin splints treatment at our Sydney clinics. Each one targets a different piece of the puzzle, from calf tightness to weak stabilising muscles, so you can build a treatment routine that gets you back on your feet with confidence.
1. Standing calf stretch
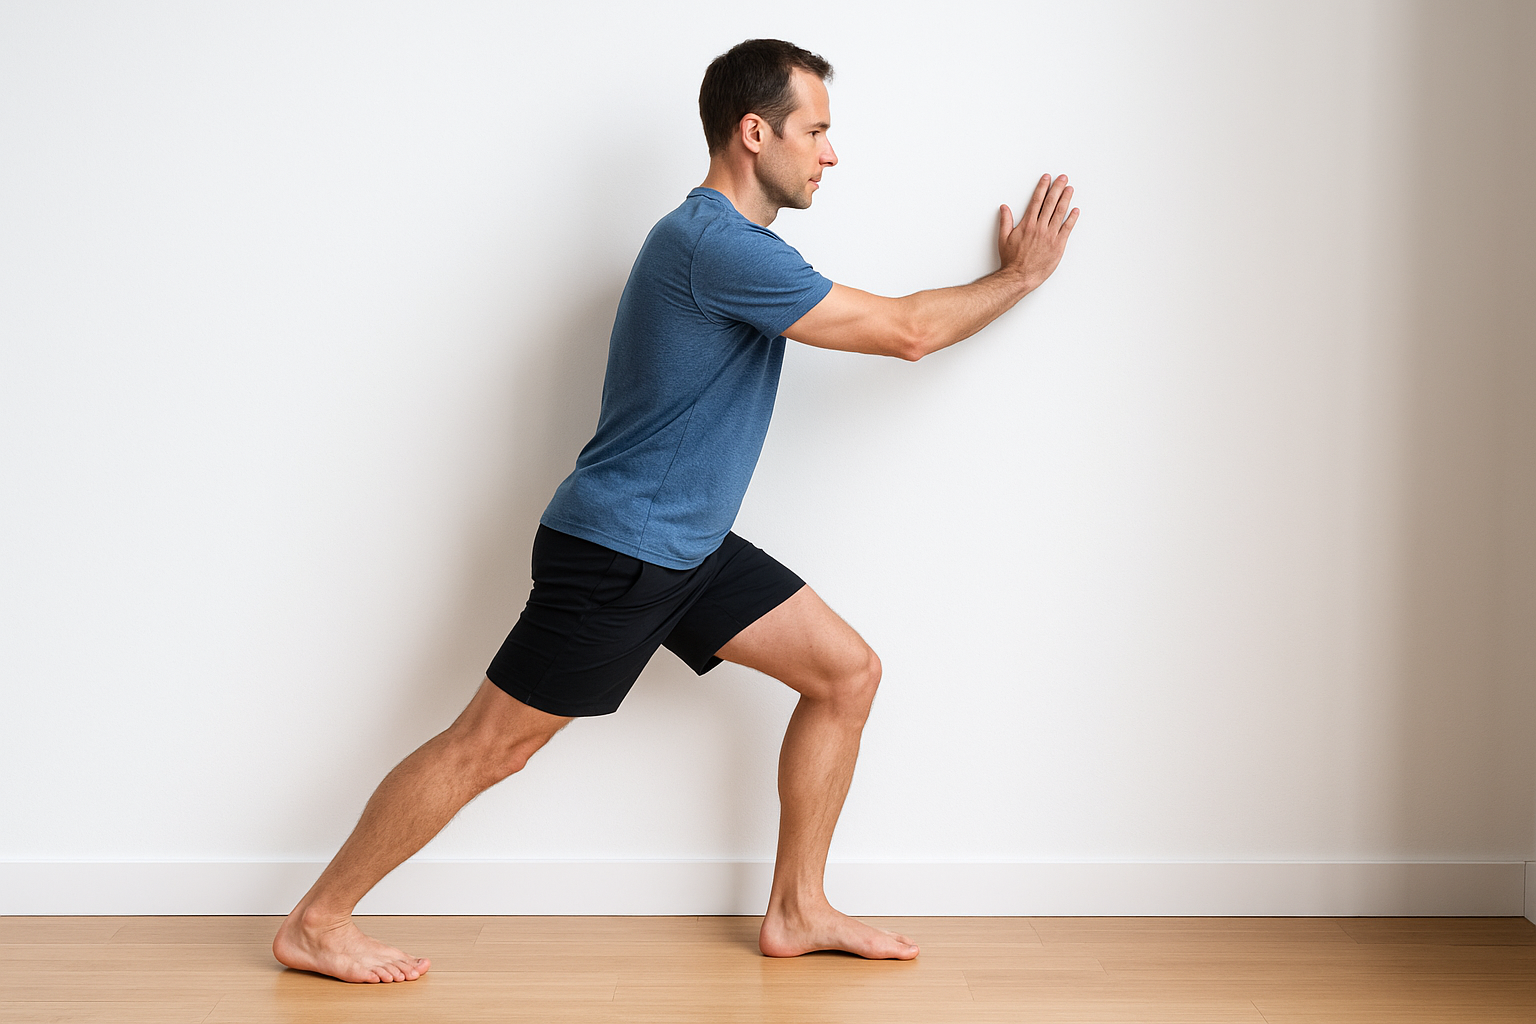
Tight calves are one of the biggest drivers of shin splints, because they pull on the tissue that wraps around your shin bone every time your foot strikes the ground, which is one reason calves tighten up after running. The standing calf stretch is the simplest way to release that tension, and it needs nothing more than a wall or a step. We start almost every shin splints consult with this stretch because it’s easy to feel working and easy to get wrong, so getting the technique right matters more than people expect.
How to do it
Stand facing a wall with your hands pressed against it at shoulder height. Step one foot back about a metre, keeping that back leg straight and both heels flat on the floor. Bend your front knee and lean into the wall until you feel a stretch through the calf of your back leg. Hold that position, keep your back heel glued to the ground, and don’t let your foot turn outwards, which lets you cheat the stretch.
Muscles it targets
This move lengthens the gastrocnemius, the larger, more superficial calf muscle that crosses both the knee and ankle joints. Because the knee stays straight, you’re isolating this muscle specifically, rather than the deeper soleus underneath it, which responds better to a bent-knee version.
Sets and reps
Hold each stretch for 30 seconds, then relax and repeat three times per leg. Do this twice a day, once after a light warm-up and once in the evening, particularly on days you’ve trained. Stretching cold muscle does little good, so a few minutes of walking beforehand makes the stretch far more effective.
A tight calf pulls on your shin with every step, so loosening it is often the fastest route to real relief.
Best for relief or prevention
This stretch earns its place at the top of the list because it works for both relief and prevention. In an active flare-up, it eases the tension causing your pain. Once you’re symptom-free, keeping it in your regular warm-up routine stops tightness building back up before your next run or match.
2. Seated soleus stretch with a towel or strap
Sit on the floor with your leg out straight and loop a towel, resistance band or dressing gown strap around the ball of your foot. Gently pull the strap towards you, bending your knee slightly as you do, until you feel a stretch deep in the lower calf. This seated soleus stretch reaches muscle fibres that the standing version can’t, which makes it a useful addition rather than a replacement.
How to do it
Keep your knee bent throughout, since a straight leg shifts the work back onto the gastrocnemius. Pull the strap slowly, hold, and avoid yanking your foot into position, which can aggravate an already irritated shin.
Muscles it targets
This shin splints stretch isolates the soleus, the flatter muscle sitting underneath the gastrocnemius that attaches lower down near the ankle. It’s a major contributor to medial tibial stress syndrome, the clinical name for most shin splints cases, and one of several reasons shin splints develop.
Bending the knee is what separates a genuine soleus stretch from just repeating the calf stretch you’ve already done.
Sets and reps
Hold for 30 seconds, three times per leg, once daily. It pairs well straight after the standing calf stretch.
Best for relief or prevention
We lean on this one mainly for active relief, since deep soleus tightness is common in flare-ups, though it’s worth keeping in a maintenance routine too.
3. Calf raises
Once the stretching has eased acute tightness, calf raises build the strength needed to stop shin splints returning. Weak calves force your shin muscles to absorb more shock than they should during running and jumping, so this simple bodyweight exercise addresses the root cause rather than just the symptom.
How to do it
Stand with the balls of your feet on a step or flat ground, holding a wall or rail for balance. Rise up onto your toes as high as you can, pause briefly at the top, then lower slowly under control rather than dropping down. Doing this on a step lets you dip your heels below the edge for a fuller range of motion once the basic version feels easy.
Muscles it targets
This exercise strengthens both the gastrocnemius and soleus together, plus the smaller stabilising muscles around your ankle. Building genuine calf strength, not just flexibility, is what keeps these muscles resilient under repeated load.
Flexible calves that are also weak will keep breaking down under load, so strength has to follow stretching.
Sets and reps
Aim for three sets of 15 repetitions, four to five times a week. Progress to single-leg raises once double-leg sets feel effortless.
Best for relief or prevention
Calf raises belong firmly in the prevention category, best introduced once acute pain has settled rather than during a sharp flare-up.
4. Toe raises for the tibialis anterior
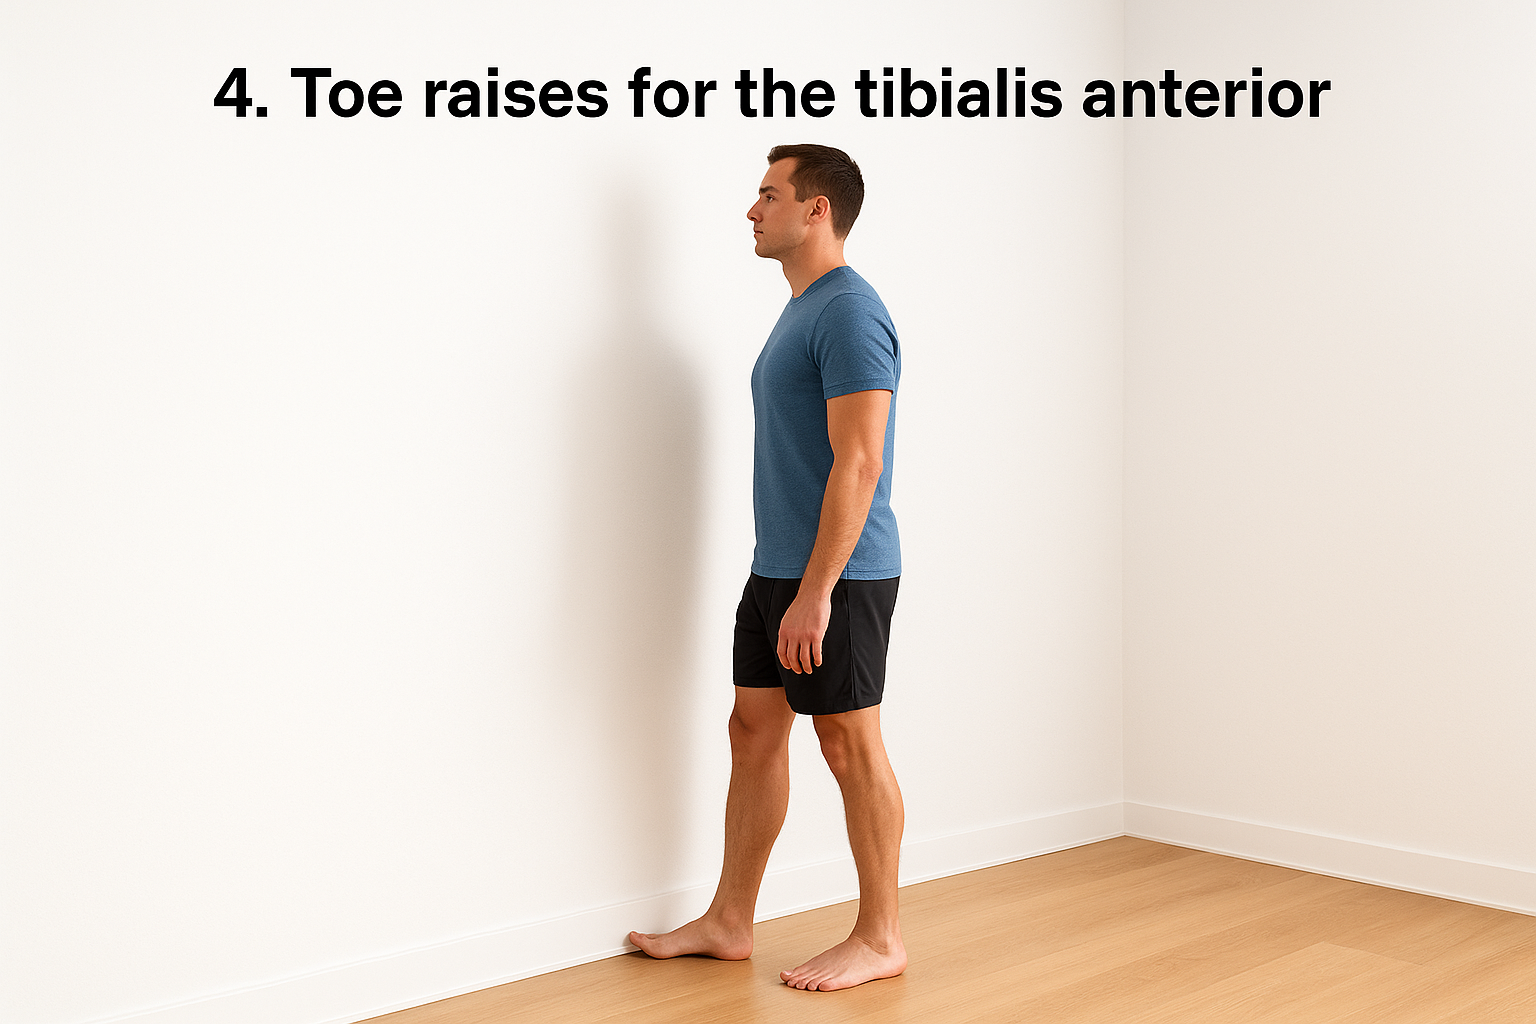
Most shin splints cases involve pain along the inner or front edge of the shin bone, and that’s exactly where the tibialis anterior sits. This muscle lifts your foot with every stride, and if it’s weak or overworked, it takes the brunt of repetitive impact. Toe raises train it directly, making this one of the most targeted shin splints treatment exercises you can do at home.
How to do it
- Stand with your back against a wall, feet a small step forward.
- Lift your toes and the front of your foot off the ground, keeping your heels planted.
- Hold briefly at the top, then lower under control.
- Progress by doing the same movement standing away from the wall for balance.
Muscles it targets
This move isolates the tibialis anterior, running down the front of your shin, plus the smaller extensor muscles that help control your foot as it swings through each step.
A weak tibialis anterior forces your shin bone to absorb load it was never designed to handle alone.
Sets and reps
Complete three sets of 15 to 20 repetitions, most days of the week. Increase difficulty using a resistance band looped over your foot once bodyweight feels easy.
Best for relief or prevention
Toe raises suit preventing shin pain best, though light, pain-free sets can help while exercising with shin splints during early recovery.
5. Single-leg balance and arch strengthening
Shin splints often come with poor foot control, since the small muscles supporting your arch get overlooked until they fail under repeated load. Single-leg balance work retrains this control and strengthens the foot’s arch alongside the lower leg, and it sits well alongside other exercises for arch pain relief, tying together everything the earlier exercises have built.
How to do it
Stand barefoot on one leg, keeping a soft bend in your knee and your gaze fixed ahead. Hold steady for 30 seconds, then swap sides. Once that feels stable, add an arch strengthening element by scrunching a towel with your toes, or practising the "short foot" exercise, drawing the ball of your foot towards your heel without curling your toes.
Muscles it targets
This exercise works the tibialis posterior and the intrinsic muscles of the foot, which support your arch and control how force travels up into your shin during running.
Weak foot control quietly overloads your shin long before pain shows up, so balance training closes that gap.
Sets and reps
Aim for three rounds of 30 seconds per leg, daily if possible, adding the towel scrunch for two sets of 15.
Best for relief or prevention
Use this mainly for prevention, introducing it once sharp pain has settled, since it builds the resilience that stops shin splints returning.
Getting back to pain-free movement
These five exercises work best as a system, not a menu you pick from once. Start with the stretches to settle tight, irritated tissue, then layer in the strengthening work as pain eases, building towards single-leg balance once you’re moving confidently again. Consistency matters more than intensity here. A few focused minutes daily will do more for your shins than one long session a week.
If pain persists beyond two to three weeks despite doing everything right, or it’s sharp rather than dull, that’s your cue to get it checked properly rather than guessing. Shin splints can mimic other issues like stress fractures, and a proper assessment saves you weeks of frustration. Our podiatrists across Sydney use gait analysis to find exactly what’s driving your pain, then build a treatment plan around it. If you’re ready for that clarity, book a shin splints assessment online and get moving again without the guesswork.