

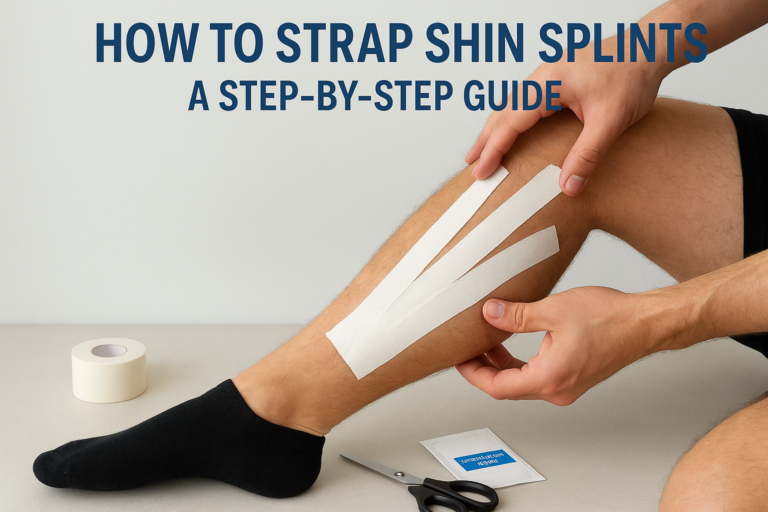
Shin pain that flares up every time you run or train is frustrating, especially when you’re trying to push through a training block or get back to sport. If you’ve searched how to strap shin splints, you’re probably after a practical way to ease the ache and keep moving without making things worse. That’s a fair goal, but taping works best as a short-term support, not a fix for what’s actually causing the pain.
This guide walks you through strapping shin splints step by step, using rigid sports tape or kinesiology tape to reduce load on the shin and support the muscles pulling on your tibia. We’ll cover what you need, how to prep your skin, and the taping pattern that podiatrists actually use for medial tibial stress syndrome.
We’ll also flag when strapping isn’t enough on its own. At ModPod Podiatry, we see plenty of runners and active Sydneysiders who’ve taped their shins for weeks without addressing the underlying biomechanical issue, whether that’s whether overpronation can be corrected, worn footwear, or training load. Get the taping technique right here, then know when it’s time for a proper gait assessment and what a gait analysis podiatrist checks.
Why strapping can ease shin splint pain
Shin splints, or medial tibial stress syndrome as podiatrists call it, happen when the muscles and connective tissue along your tibia get overloaded faster than they can recover. Every stride pulls on the tibialis posterior and soleus where they attach to the bone, and repeated pounding on hard surfaces or a sudden jump in training volume irritates the periosteum, the thin membrane wrapping the bone itself. That’s the deep, aching pain you feel along the inner edge of your shin, the hallmark of inner shin pain from posterior shin splints, worse at the start of a run and sometimes easing once you’re warmed up, only to flare again afterwards.
Strapping doesn’t heal that irritated tissue the way rest, ice and other home treatments for shin splints can, but it changes how load moves through your lower leg while you’re active. Applying tape along the shin adds gentle compression to the muscle bellies, the same principle behind shin splints support socks, limiting how far they stretch and vibrate with each footstrike. Less excessive movement means less tugging at the bone attachment, and less tugging means less pain signalling from an already irritated area. Tape also feeds your brain constant proprioceptive feedback, a fancy way of saying it reminds your muscles to fire earlier and stabilise the shin before impact rather than reacting to it.
Strapping doesn’t fix shin splints, it buys your shin some breathing room while the real cause gets sorted.
The two taping approaches podiatrists use
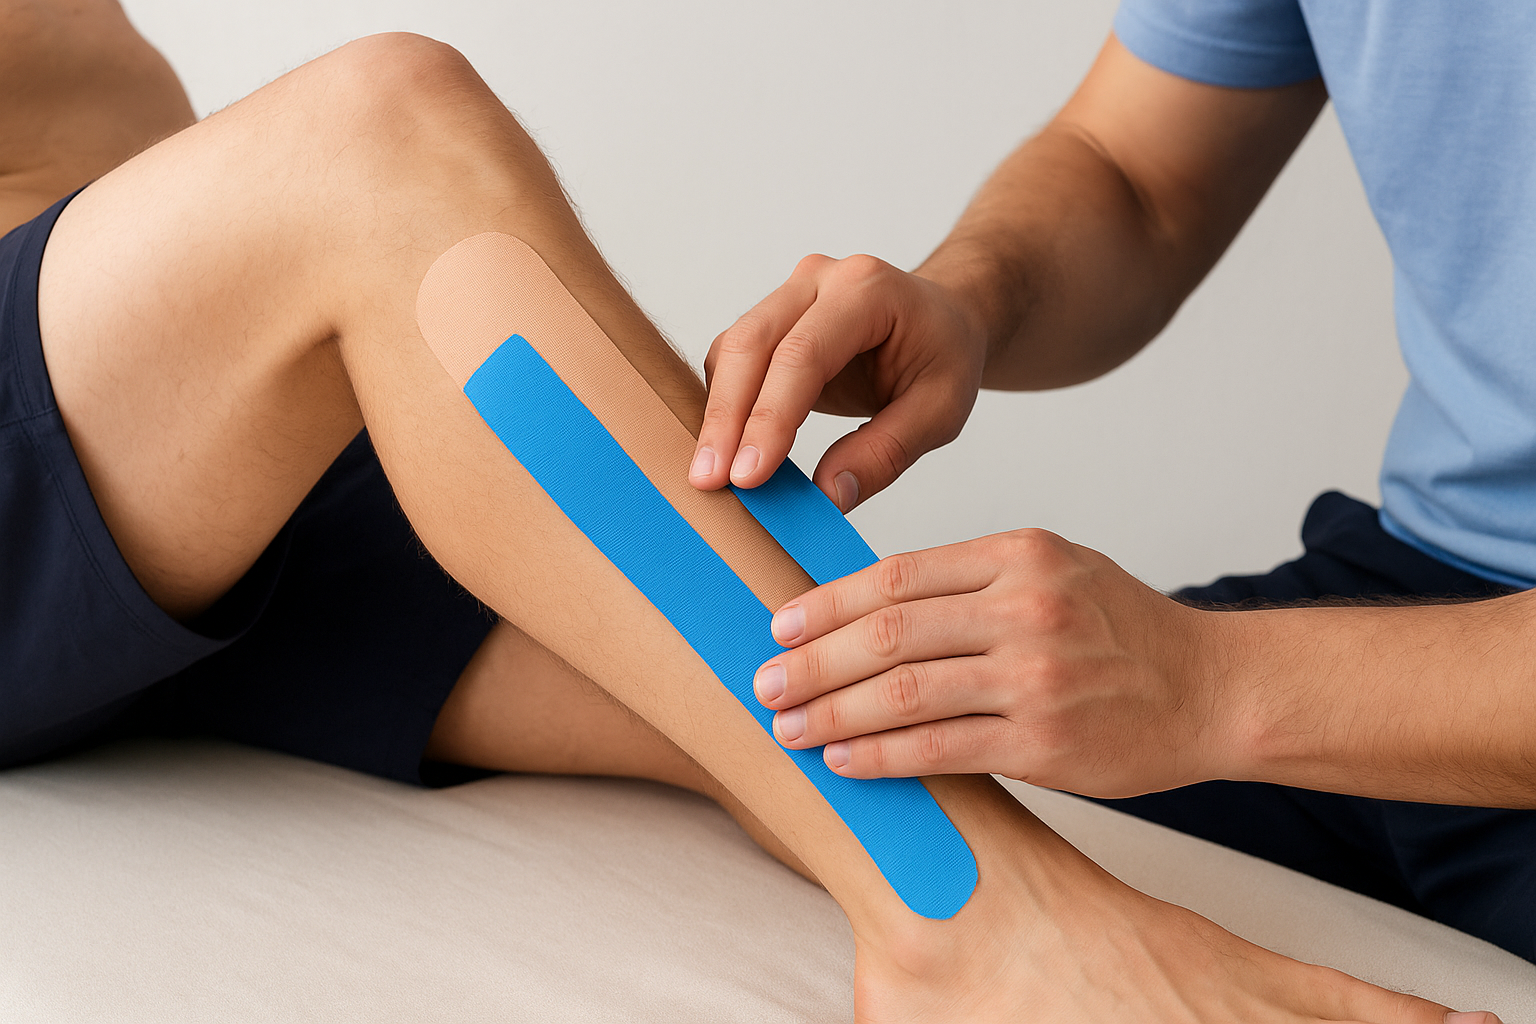
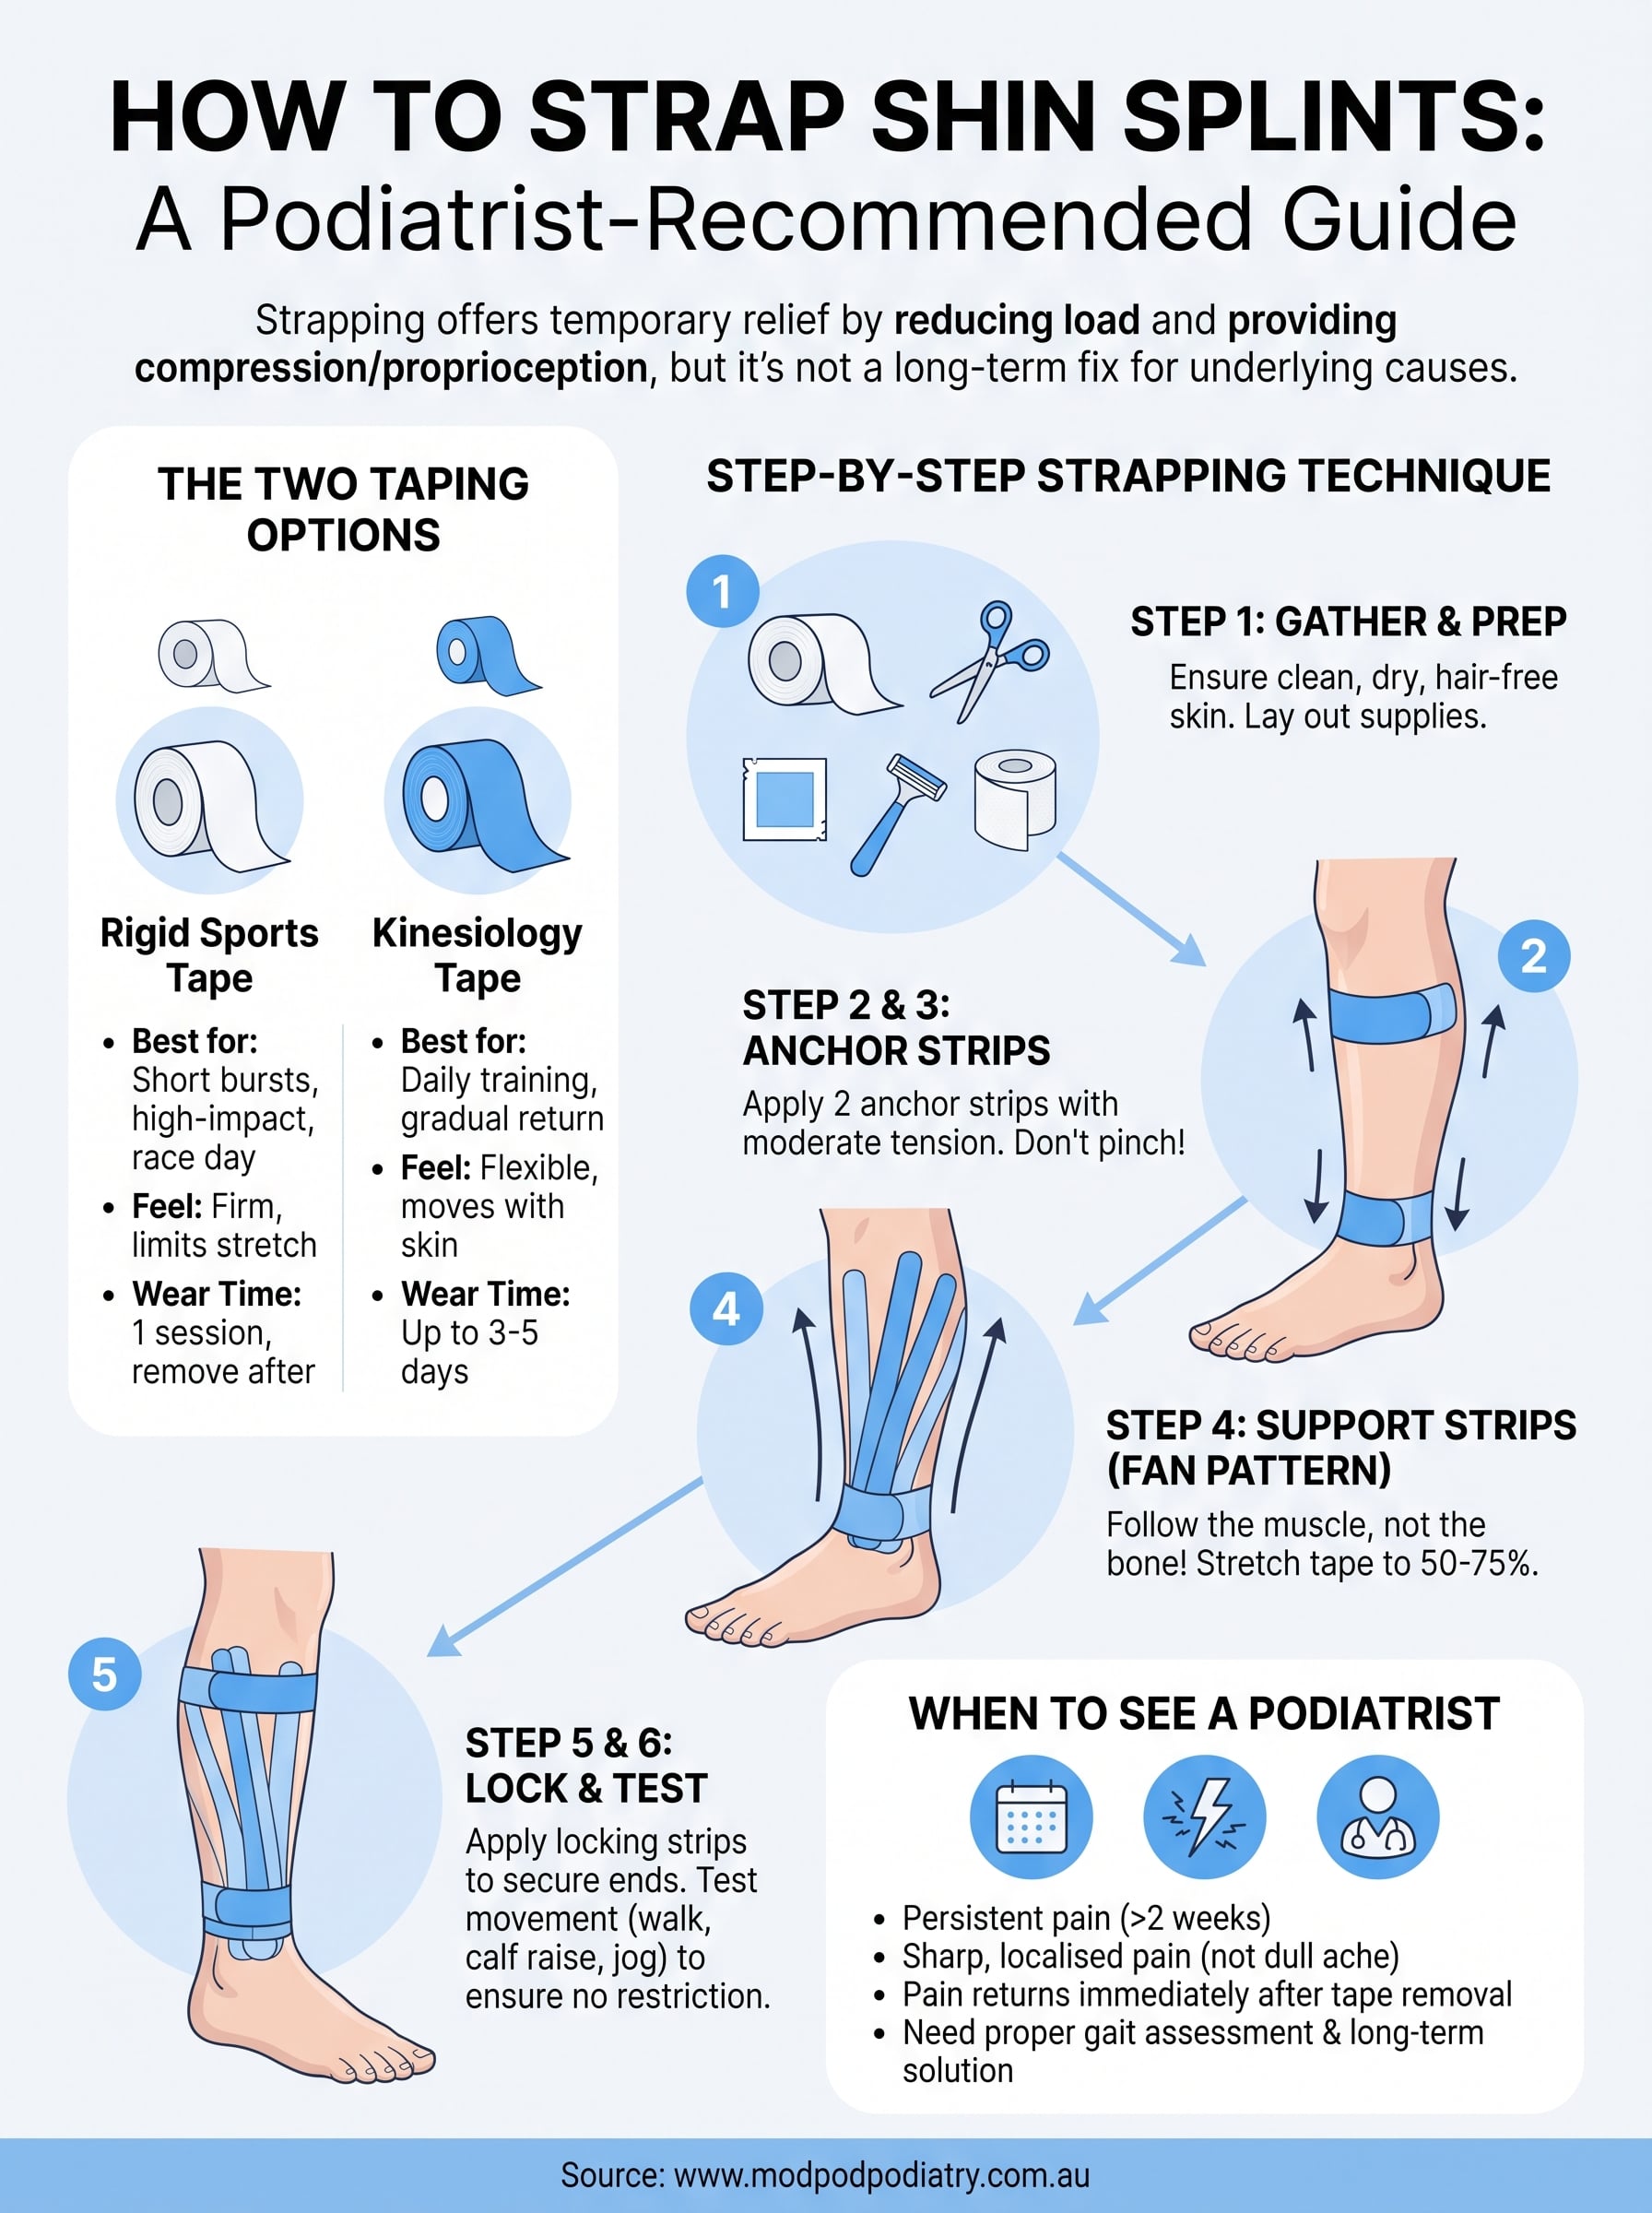
When people ask about shin splint taping, they’re usually picturing one of two materials, and each does a slightly different job. Rigid sports tape, like zinc oxide tape, restricts movement more firmly and suits short-term relief during a single training session or race. Kinesiology tape, the stretchy coloured tape you’ve probably seen on athletes, moves with the skin and is better for ongoing support across a training week without restricting circulation as much.
| Tape type | Best for | How it feels | Typical wear time |
|---|---|---|---|
| Rigid sports tape | Short bursts of high-impact activity, race day | Firm, limits stretch | 1 session, remove after |
| Kinesiology tape | Daily training, gradual return to running | Flexible, moves with skin | Up to 3-5 days |
Neither option is a long-term answer on its own, but choosing the right one for your situation makes the strapping technique far more effective while you sort out the underlying cause with professional shin splints treatment in Sydney.
Why this matters beyond just the pain
Understanding the mechanism also explains why sloppy taping doesn’t help much. If the tape isn’t anchored with enough tension along the right muscle groups, you’re not getting meaningful compression or proprioceptive input, just a strip of fabric stuck to your leg. That’s why the step-by-step pattern in this guide matters more than simply wrapping tape around your shin a few times.
Getting this right also buys you time to address what’s driving the overload in the first place, whether that’s a recent spike in kilometres, shoes that have lost their shock absorption or never matched how a running shoe should fit, or a biomechanical pattern like overpronation that puts extra strain on the tibia with every step. Taping treats the symptom well enough to keep you moving in the short term, which is exactly why so many runners reach for it, but it’s not a substitute for orthotics made for your gait or working out why your shins are struggling in the first place.
Step 1. Gather your taping supplies
Before you touch your leg, lay everything out within arm’s reach. Stopping halfway through a strapping job to hunt for scissors is how tape ends up wrinkled, loose, or stuck to the wrong bit of skin. Shin splint taping only works if you can move through each strip in one smooth motion, so treat this prep step as non-negotiable rather than optional.
Here’s what you need on hand:
- Rigid sports tape (38mm zinc oxide tape) or kinesiology tape, depending on which approach suits your training that day
- Underwrap or pre-tape foam, especially if you have sensitive skin or you’re taping daily
- Sharp, blunt-nosed scissors for clean cuts, not the tape’s own tear edge, which leaves ragged strips that lift early
- A skin-prep wipe or rubbing alcohol to remove sweat and oils
- A razor, if your shin has more than light hair
- A towel or mirror, so you can see and reach the inner shin properly
Skip the scissors and you’ll be tearing tape with your teeth halfway through strapping, and the result always shows.
Measure and pre-cut your strips before you start rather than cutting as you go. For most adults, you’ll need three to four anchor strips around 10cm long and four to six support strips running the length of the shin, roughly 15 to 20cm depending on your leg length. Lay them out in order on the edge of a table or bench, so you’re not fumbling with the roll while tape is already stuck to your leg.
Grab a second person if this is your first attempt. Reaching your own shin at the right angle while keeping tension even is trickier than it looks, and a friend or training partner can pull the tape straight while you position it. If you’re taping solo, sit with your foot flat on a raised surface, like a chair or step, so your calf and shin muscles sit in a relaxed, slightly stretched position, similar to how they’ll sit mid-stride. This is the same position podiatrists use during a clinical gait assessment, because taping over a tensed or flexed muscle gives you the wrong amount of slack once you’re back on your feet.
Step 2. Prepare your skin and lower leg
Skin prep decides whether your shin splint taping lasts through a whole session or peels off within twenty minutes. Sweat, sunscreen, and natural body oils all sit on the surface of your skin and stop the adhesive from gripping properly, so wipe the entire lower leg with a skin-prep wipe or rubbing alcohol before you touch a strip of tape. Let it air dry fully, this only takes a minute, but rushing it is the single biggest reason strapping fails early.
Hair on the shin and calf also breaks the seal, lifting the tape at dozens of tiny points you won’t notice until you’re mid-run. If you’ve got more than light, fine hair, run a razor over the area the night before rather than immediately beforehand, since fresh shaving can leave skin slightly irritated and less receptive to adhesive. Rinse away any loose hair or debris afterwards and let the skin settle.
Clean, dry, hair-free skin isn’t a nice-to-have, it’s the difference between tape that holds and tape that quits on you at kilometre three.
Once the surface is ready, position your leg correctly. Sit with your foot flat on a step, chair, or bench so your ankle sits at roughly a right angle and your calf muscle is neither fully stretched nor bunched up. This neutral position mimics the mid-stance phase of your gait, which is when the tibialis posterior and soleus are under the most load.
Run through this quick checklist before moving to the anchor strips:
- Skin wiped clean with alcohol or a prep wipe and fully dry
- Excess hair shaved the night before, not immediately prior
- Any cuts, rashes, or broken skin covered or avoided entirely
- Underwrap applied if you have sensitive skin or you’re taping most days
- Leg positioned with foot flat and ankle at a neutral angle
Finally, check the skin itself for anything that should stop you taping altogether. Broken skin, active rashes, or a fresh graze near the shin means you should skip direct adhesive contact and use underwrap as a barrier, or hold off on taping until it’s healed.
Step 3. Apply the anchor strips
Anchor strips are the foundation everything else sticks to, so get these two right before you touch a support strip. The first anchor wraps around your leg just below the knee, roughly a hand’s width above where your shin pain sits. The second wraps around your ankle, just above the bony malleoli on either side. Both anchors run around the full circumference of the leg, not just across the front, and both should sit flat with even, moderate tension, firm enough to stay put but never tight enough to pinch or restrict blood flow.
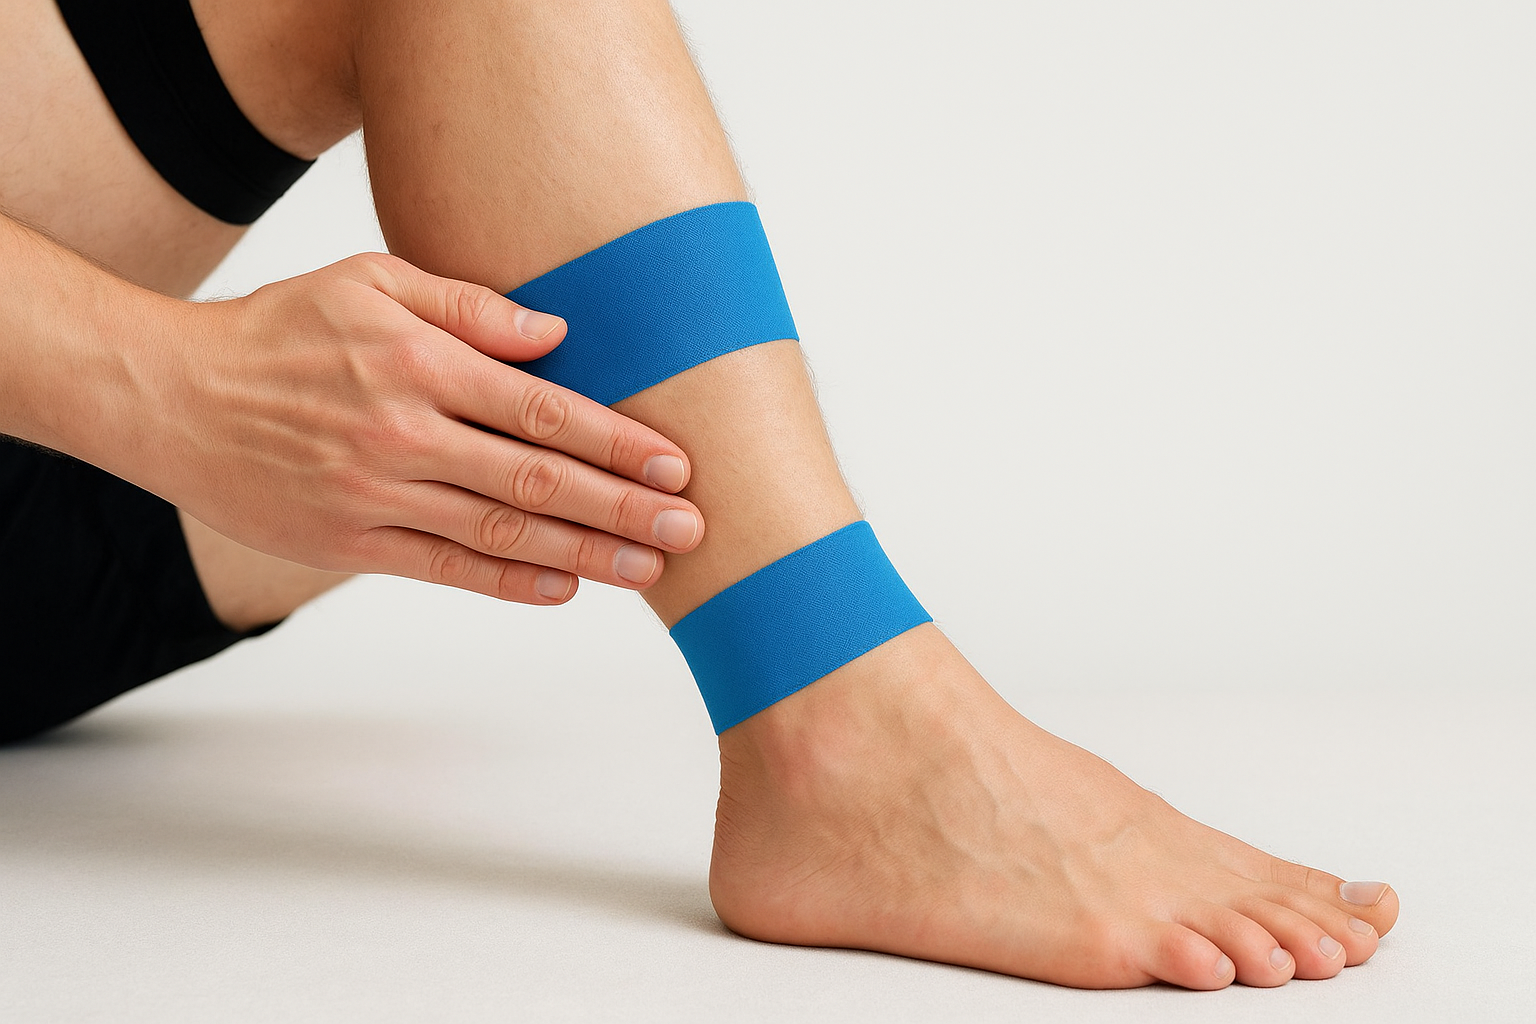
Get your anchors wrong and every strip after them is fighting a losing battle against loose tape.
Positioning the two anchors
Work through these steps in order, smoothing each strip down before moving to the next:
- With your foot flat and ankle at a neutral angle, wrap the first anchor strip below the knee, overlapping the ends by about 2cm
- Wrap the second anchor strip just above the ankle bones, keeping the same light, even tension
- Press each anchor down firmly with the flat of your hand, working from the centre outward to squeeze out air bubbles and activate the adhesive
- Leave a clear gap of roughly 15 to 20cm between the two anchors, this is where your support strips will run
Once both anchors are down, run a finger underneath each edge to check nothing’s lifting already. A properly placed anchor shouldn’t dig in, wrinkle, or leave a red pressure line the moment you stand up. If either strip feels uncomfortably tight, unwrap it and reapply with slightly less tension rather than pushing on, since an overly tight anchor at the knee or ankle can restrict circulation over a long run and cause more discomfort than the shin splints themselves. These two strips carry the load for everything you add next, so it’s worth the extra thirty seconds to get them sitting flat and even before you move on to the support strips that actually target the painful area.
Step 4. Add the support strips along the shin
With both anchors sitting flat, it’s time to add the strips that actually do the work of supporting your shin. Cut four to six lengths of tape running from the lower anchor to the upper one, following the path of the tibialis posterior, which sits just off the inner edge of the shin bone rather than straight down the middle. Taping directly over the bone gives you a strip stuck to skin with almost no muscle underneath, so it does nothing for the tissue that’s actually overloaded.
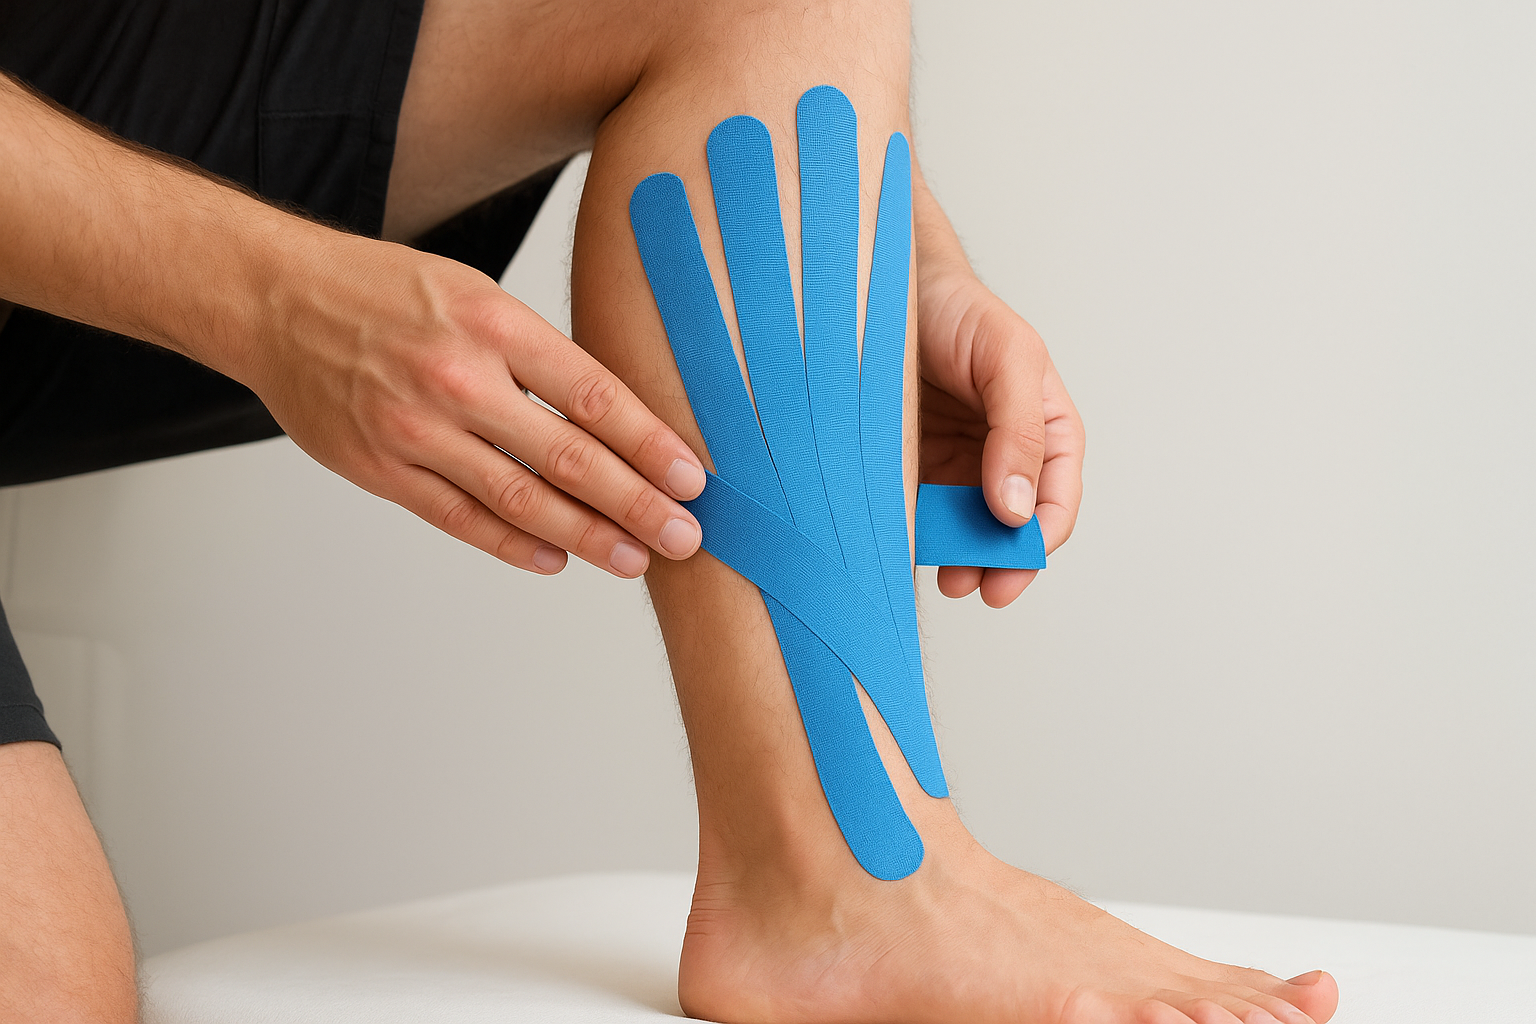
Follow the muscle, not the bone, or your support strips are just decoration.
Laying the strips correctly
Apply each strip with a fan pattern, starting from the inner ankle anchor and fanning slightly outward as you move up towards the knee anchor. This mirrors how the tibialis posterior and soleus actually pull on the tibia, so the tape supports the real line of tension rather than a straight vertical guess. Work through the strips like this:
- Start each strip at the lower anchor, overlapping it by about 2cm
- Stretch the tape to roughly 50 to 75% of its available stretch, not full stretch, as you lay it along the shin
- Press it down as you go rather than sticking both ends first and smoothing the middle after
- Angle each successive strip 1 to 2cm further round the leg, building the fan shape
- Finish each strip overlapping the upper anchor by about 2cm
Getting the stretch right matters more than most people think. Too little stretch and the strip does nothing beyond sitting there. Too much stretch and you’ll bunch the skin or restrict movement so much that your calf feels locked up within a few strides, much like tight calves after running.
Once your fan of support strips is down, run your palm firmly along the whole length of each one, working from the anchor outward to bed the adhesive in properly. Check that the strips overlap each other slightly along their edges, with no gaps of bare skin showing between them across the painful section of the shin. If you can see daylight between strips right where your pain sits, add one more thin strip through the gap before moving on, since that’s the exact spot the tape needs to be doing its job.
Step 5. Lock the strapping into place
Now that your fan of support strips is down, the whole structure needs locking off so it doesn’t shift or peel during a session. Two horizontal locking strips do this job, one placed just below the knee anchor and one just above the ankle anchor, running around the full circumference of the leg the same way your original anchors did. These aren’t decorative, they’re what stops the support strips lifting at their ends when your calf flexes hard through a run.
Apply each locking strip with these steps:
- Cut a strip long enough to wrap fully around the leg with a 2cm overlap
- Lay it directly over the top third of the anchor strip nearest each end, sandwiching the ends of your fan strips underneath
- Keep tension light and even, matching the anchors rather than pulling tighter
- Smooth from the centre outward with the flat of your hand to bed the adhesive down
A fan of support strips without locking strips is just tape waiting to peel off mid-run.
Once both locking strips are on, add a light closure strip if you’re using rigid tape and expect a longer session, a single loop of tape halfway between the two locks, again running fully around the leg. This isn’t essential for kinesiology tape, which flexes with the skin anyway, but it adds real staying power to rigid strapping over a long training run or a full match.
Press everything down one final time, working systematically from the knee anchor down to the ankle anchor rather than jumping between sections. Warmth from your palm activates the adhesive properly, so spend a good thirty seconds on this rather than a quick pat. Check the whole strapped area with your fingers for any strip edges that feel loose or any patch of skin still showing daylight, particularly where the locking strips cross the fan pattern, since that junction takes the most strain once you’re moving. If something feels off here, sort it now. Fixing a loose edge before you’ve stood up is far easier than trying to patch a peeling strip halfway through a run when your hands are sweaty and you’re short on time.
Step 6. Check the tape and test movement
Before you lace up and head out the door, put the strapping through its paces while you’re still standing in a safe, controlled space. Walk a few steps, rise onto your toes, and flex your ankle through its full range to see how the tape responds under real muscle movement rather than just sitting still on your leg. Shin splint taping that looks perfect lying flat can still bunch, pull, or gap once your calf actually contracts, so this test step catches problems before they cost you a session.
Run through a quick movement check
Work through these checks before you start your run or training session:
- Walk normally for 20 to 30 steps, checking for any pulling, pinching, or skin folding at the ankle and knee anchors
- Rise onto your toes ten times to load the calf and check the fan strips don’t lift at their edges
- Flex and point your foot through its full range to confirm no strip is restricting normal ankle movement
- Jog lightly on the spot for 15 to 20 seconds if you’re heading into a run, since this mimics footstrike load far better than walking does
- Check both anchors haven’t crept below where they started, which signals the tension was too loose
If the tape moves independently of your skin during this check, it’ll move a lot more once you’re three kilometres into a run.
Know what a proper strap should feel like
A well-applied strap feels snug and supportive without any sharp pinching, numbness, or colour change in your foot. Numbness, tingling, or a foot that looks pale or dusky compared to the other one means circulation is compromised, and you need to remove the tape immediately rather than pushing through a session hoping it settles. Discomfort that’s mild and even across the strapped area is normal; discomfort that’s sharp, localised, or worsening with movement is not.
Trust what your leg tells you over what the tape looks like. Sensation always beats appearance here, since strapping can look flawless and still be doing more harm than good if it’s cutting off blood flow at the ankle. Once you’re confident the tape holds through movement and your circulation checks out, you’re good to head into your session.
When it’s time to see a podiatrist
Strapping gets you through a session, but it won’t stop shin splints coming back if the underlying cause is still there. Persistent shin pain that lingers more than two weeks, worsens despite rest, or returns as soon as you unwrap the tape is your leg telling you strapping alone isn’t enough anymore. Sharp, localised pain rather than a dull ache can also point to a stress fracture, which needs proper imaging, not more tape.
Getting a proper gait assessment finds out whether overpronation, worn footwear, or training load is driving the overload in the first place, and a podiatrist can build a plan around fixing that rather than masking it every training day. Custom orthotics often play a real role here when biomechanics are the culprit. If your shins keep flaring up, stop guessing and book a shin splints assessment with ModPod Podiatry that gets to the actual cause.